With today’s digital cameras, it’s easy to get a well-exposed photo. But how to go one step further and create an image that conveys the mood you were in at the time of the shooting? There are several methods you can use to express the feelings the scene evoked in you. They all require creative input from the photographer. By the way, particularly vivid and emotional shots can be framed as photographic paintings to earn extra income. We recommend you read the article on Skylum’s blog about the advantages and disadvantages of glossy vs luster photo paper to offer clients the best option.
In this article, we are going to look at some techniques that you can use to bring mood and emotion to your photos.

Take photos in low-light conditions
Try taking pictures in low-light conditions. Low light gives the picture a mood and evokes memories. If you are shooting static subjects, like in the case of landscapes, you can put the camera on a tripod and use a cable to avoid camera shake.
But if you’re photographing moving objects, like people, you need to use high ISO and a wide aperture to set the shutter speed short enough to avoid camera shake. Don’t be afraid of high ISO; noise can give your photos a mood, just like grain in the case of film. In low light conditions, you can also use slower shutter speeds to create blur in your images. This is another cool way to bring the mood to a shot.
Choose a wide aperture
Try to use the widest aperture on your lens. If you’re using zoom lenses, that value would be up to f/5.6. This technique works best with normal and telephoto lenses because they have a shallower depth of field. The idea is to focus clearly on your subject and make sure the background is out of focus. This technique is often used in portraits, focusing on the model’s eyes and using a wide aperture so that part of the face and the background are blurred.
The out-of-focus background gives a mood to the shot because we can’t quite figure out what it should be. We have to engage our imagination to fill in the gaps. The technique works best when the background is darker than the subject (the shadows look more emotional than the bright, bright areas).
For example, the combination of a wide aperture, close focusing distance, and the use of a telephoto lens can achieve a very shallow depth of field that takes the background completely out of focus.

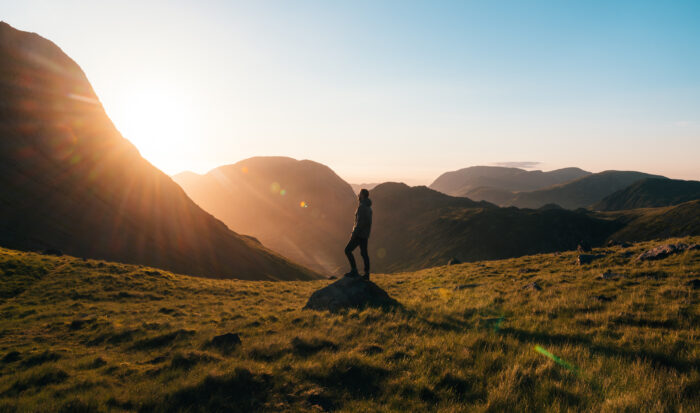
Don’t miss the sunset and sunrise
Shooting sunsets is probably potentially one of the most boring clichés in photography. Now we will tell you more about how it works:
- This technique works best when there is water in the frame because at sunset, the beautiful lighting colors the sky in delightful hues that reflect on the surface of the body of water. The light from the setting sun is very warm.
- If you are photographing a sunset, make sure you look back to see what the sun is illuminating. This shot may be even better than the sunset itself.
- The best lighting comes when the sun has already set, especially if there is water in the frame that will be able to reflect the color of the sky. If you are by the sea during the day and you find a beautiful spot, imagine what it will look like during sunset. It’s almost always better, and it’s worth it to come back in the evening to take pictures.
- You can also take pictures at sunrise. The light had a different quality at that time because the air was more transparent, and the colors were different.
If you know how to do it well, you can use this technique to create incredibly beautiful landscape photos.
Add texture
Adding textures is a good technique for creating photos with mood. You can combine it with conversion to black and white and toning. As with the conversion to black and white, you must start with a photo that already carries the mood. The goal is to go as far as you can and see how interesting you can make your shot.
Use this technique selectively. It doesn’t go with every photo, and if you add textures to all your shots, it will soon become boring. Ideal subjects are portraits, nude shots, still lifes, and some landscapes. How do you add texture to your photos? You need a photo editor that supports working with layers (like Luminar Neo). You simply paste the texture as a new layer on top of the original image and then adjust the transparency and layer blending mode to get the effect you want.
Convert to black and white
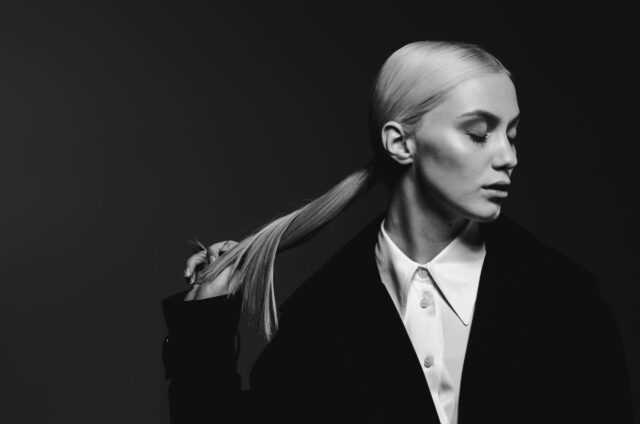
Black and white photos create a mood. This technique is best used in conjunction with the others above. The idea is to make your already moody shots super moody by converting them to black and white.

When you’ve already converted your photos to a black-and-white palette, you can give them an extra touch of mood by tinting them. Toning in sepia tones works well for landscapes and portraits. Shades of blue are for objects with a sense of coldness, such as winter landscapes.
Don’t forget that proper post-processing will help add incredible drama to the photo. We recommend trying Luminar Neo. It offers all the editing tools and options you need to create a stunning and original look for your images. You don’t need professional help to make your photos more stunning because it only takes a few clicks to read the artwork. Also, black and white images look very effective as pictures on walls. Don’t forget to read the article about glossy vs luster photo paper on the Skylum website to choose the right option for your prints.


